EPDM roof installation is one of the most reliable ways to waterproof a flat or low-slope roof, and it’s more approachable than most roofing projects — if you understand what’s involved before you start.
Quick answer: Here’s how EPDM roof installation works, step by step:
EPDM (ethylene propylene diene monomer) is a synthetic rubber membrane used on flat and low-slope roofs. It’s flexible, durable, and can last 20 to 50+ years when installed correctly. It’s used on everything from garden sheds and house extensions to large commercial buildings.
That said, getting it wrong has real consequences — poor seams, skipped prep steps, and wrong adhesive choices are the top reasons EPDM roofs fail early. Some of those mistakes can also void your warranty.
I’m Jason Hedtler, owner of Roof Experts LLC in Bellingham, MA, and I’ve led countless EPDM roof installation projects across suburban Massachusetts, from straightforward residential flat roofs to more complex commercial reroof jobs. In this guide, I’ll walk you through everything you need to install EPDM correctly — and flag the spots where calling a pro is the smarter move.

Basic EPDM roof installation glossary:
There are three main EPDM roof installation methods: ballasted, mechanically attached, and fully adhered. A fourth option, self-adhered EPDM, is a newer variation with factory-applied adhesive.
Here is a plain-English comparison:
| EPDM system | How it is held down | Best for | Cost tier | Key cautions |
|---|---|---|---|---|
| Ballasted | Loose-laid membrane covered with stone or pavers | Large, low-slope roofs with enough structural capacity | Usually lowest material/labor cost | Heavy; needs ballast design and wind-uplift review |
| Mechanically attached | Fasteners and plates secure membrane or seams to the deck | Lightweight systems, many commercial roofs, reroofs | Middle | Fastener pattern matters, especially at corners and perimeters |
| Fully adhered | Adhesive bonds membrane to insulation or cover board | Residential flat roofs, visible roofs, higher wind areas, replacements | Usually higher | Adhesive technique and substrate prep must be excellent |
| Self-adhered | Peel-and-stick membrane bonds to approved substrate | Faster adhered installations with fewer field adhesives | Often premium | Temperature, substrate, and rolling requirements are strict |
Ballasted EPDM is fast and economical, using large sheets (up to 50 by 200 feet) to reduce seams. It accounts for roughly 35% of EPDM installations. Mechanically attached systems are lightweight and secure the membrane with plates and fasteners, with tighter spacing at edges and corners. Fully adhered EPDM is common for replacements, creating a smooth, stable surface using smaller panels (up to 30 by 100 feet) for precise adhesive handling.
For a broader flat-roof overview, see our Flat Roof Installation Complete Guide and our comparison of flat roof materials, The Ultimate Showdown: Which Flat Roof Material Reigns Supreme?.
Black EPDM uses carbon black for UV resistance and absorbs heat, which helps melt snow in cold New England winters. White EPDM uses titanium dioxide to reflect sunlight, ideal for cooling performance. White EPDM is typically installed in mechanically attached or fully adhered systems rather than ballasted systems, as ballast covers the membrane and negates its reflective benefits.
For help choosing, read What Is the Best Flat Roof Material for You?.
As of May 2026, EPDM installation costs depend on membrane thickness (45, 60, or 90 mil), insulation type, tear-off requirements, roof complexity (drains, pipes, skylights), and the chosen attachment method. Ballasted is generally the most economical for heavy-load roofs, mechanically attached offers strong value, and fully adhered costs more but provides maximum stability.
Warranty coverage requires following manufacturer instructions and using compatible materials. For budget planning, see our Flat Roof Installation Price Complete Guide and Average Cost of Flat Roof Replacement.

A successful EPDM roof installation follows a strict sequence:
Never leave unfinished sections exposed overnight; use temporary water cutoffs. For technical details, see this manufacturer EPDM application guide.

The substrate must be clean, dry, smooth, and structurally sound. Remove debris, repair rot or damage, and replace wet insulation. EPDM must be separated from incompatible materials like asphalt or bitumen using an approved recovery board.
Single-layer insulation can lose up to 8% of thermal efficiency through joints and fasteners. We recommend staggered joints and multiple layers to prevent this loss.

Insulation Best Practices:
For reroofing planning, see our Flat Roof Replacement Complete Guide.
After relaxing the membrane, position sheets to overlap in shingle fashion (minimum 3-inch laps).
For Seams: Apply EPDM primer evenly, let it flash off until tacky, apply seam tape without wrinkles, and roll firmly with a hand roller. Never skip primer; tape will not bond without it.
For Flashing: Use pre-molded pipe boots, uncured EPDM flashing for corners, and secure termination bars tightly (max 6 inches on center) over water cut-off mastic.
For Adhered Systems: Apply approved adhesive to both surfaces. Coverage rates typically range from 50 to 130 square feet per gallon. Ensure the adhesive is tacky, not wet, before mating to prevent solvent blisters. Roll with a 75- to 100-pound roller. For detailed steps, see this fully adhered EPDM installation guide.
For Mechanical/Ballasted Systems: Space perimeter fasteners at 12 inches on center maximum for wind uplift. For ballasted systems, use clean, river-washed stone (minimum 10 pounds per square foot) on slopes of 2:12 or less.
Always use fall protection and proper PPE. Solvent adhesives are highly flammable; keep ignition sources away.
Weather Rules: Do not install over wet surfaces or below 40°F (unless using specific cold-weather self-adhered systems). Store materials between 60°F and 90°F.
Common Mistakes: Skipping membrane relaxation, applying adhesive while wet, omitting primer, leaving wrinkles, and mixing incompatible products. These errors lead to leaks, wind damage, and voided warranties. To find a qualified installer, read Don’t Get Roofed: How to Pick a Top EPDM Contractor.
DIY EPDM works for simple sheds, but professional installation is highly recommended for roofs with multiple penetrations, high wind exposure, ballast requirements, or warranty needs.
At Roof Experts, we install, replace, and repair flat roofs throughout Bellingham, Norfolk County, Plymouth County, and surrounding areas including Ashland, Attleboro, Canton, Dedham, Easton, Foxboro, Franklin, Mansfield, Milford, Natick, Sharon, Taunton, Walpole, and Wellesley.
With over 20 years of experience, we ensure your roof is installed correctly the first time. Compare your options with EPDM Roofers Near Me or learn what to expect from a Flat Roof Installation Contractor.
Bottom line: EPDM is highly durable, but proper installation details dictate its lifespan. Prep carefully, follow manufacturer guidelines, or call us for professional, warrantied results.
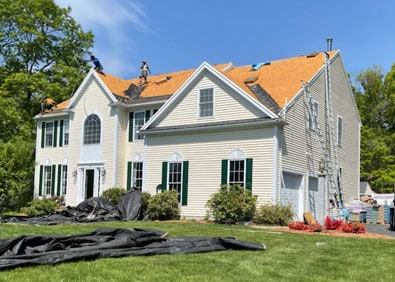
Roof Installations
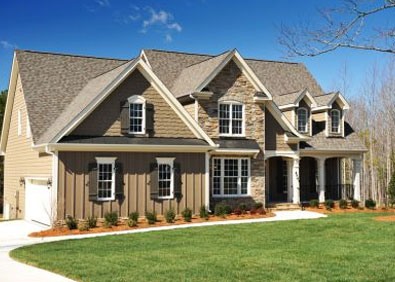
Roof Replacements
Roof Repairs