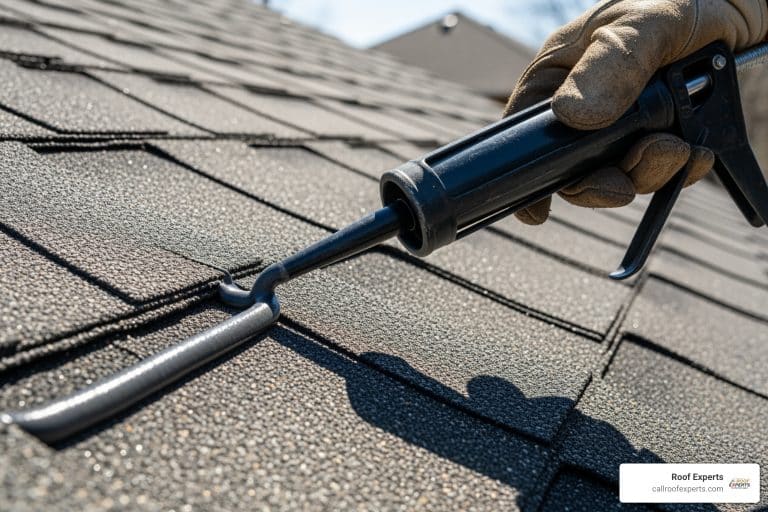

Roof repair sealant is a protective coating applied to your roof to create a waterproof barrier, prevent leaks, and protect against UV damage. It’s essential for maintaining your roof’s integrity by sealing cracks and gaps before they become costly problems.
Quick Answer: What You Need to Know About Roof Repair Sealants
A ceiling drip is a stressful sight, but the right sealant can stop small problems from becoming major headaches. However, with dozens of sealant types on the market, choosing the wrong one can mean wasted money and continued leaks.
This guide breaks down the main types of sealants, how to choose the right one, and proper application techniques. I’m Jason Hedtler, owner of Roof Experts LLC in Bellingham, MA. With years of experience helping homeowners, I know that understanding your sealant options is the first step toward a watertight roof.

Your roof takes a beating from New England weather. Roof repair sealant is your secret weapon for keeping it healthy, stopping small problems before they turn into expensive disasters.
Choosing the right sealant can feel overwhelming, but each type has specific strengths. Using the wrong one can lead to wasted money and recurring leaks. Let’s break down the four main types:
| Sealant Type | Key Properties | UV Resistance | Waterproofing | Flexibility | Common Uses |
|---|---|---|---|---|---|
| Acrylic | Water-based, good adhesion, paintable | Good | Moderate to Good | Good | Shingles, metal, low-slope roofs, general purpose sealing |
| Silicone | Excellent elasticity, durable, extreme temperature resistance | Excellent | Excellent | Excellent | Flat roofs, metal, EPDM, areas with standing water |
| Polyurethane | Very strong adhesion, abrasion resistance, durable, paintable | Good | Excellent | Very Good | Flashing, joints, seams, high-traffic areas, various substrates |
| Bituminous | Asphalt-based, wet surface adhesion, low cost | Poor to Moderate | Excellent | Moderate | Asphalt shingles, modified bitumen, concrete, emergency wet repairs |
Picking the right roof repair sealant is your foundation for success. For more detailed guidance, check out our insights on the Best Roof Sealant for Leaks.
A quality roof repair sealant does more than just stop drips. It’s a proactive investment in your home’s health. Key benefits include:
Regular use of roof repair sealant as part of a Roof Maintenance Services plan is one of the smartest investments you can make.
Choosing the wrong sealant for the job is a common DIY mistake that leads to failed repairs. To select the right product, consider these factors:

1. Roofing Material Compatibility: Using an incompatible sealant can cause poor adhesion or damage your roof. Always check the product label.
2. Climate and Durability: New England’s weather demands sealants with high flexibility to handle temperature swings without cracking. For areas with standing water, choose a product with superior waterproofing. For long-term protection, look for products with strong UV resistance and good warranties.
3. Essential Features: Look for a sealant that is waterproof, mildew-resistant, and flexible. Depending on your needs, you may also want one that is paintable (for aesthetics), highly reflective (for energy efficiency), or has wet surface adhesion (for emergency repairs).
By evaluating these factors, you can select the right roof repair sealant. For specific applications, see our Shingle Roof Leak Coating guide.
Even the best roof repair sealant will fail if applied improperly. While instructions vary by product, following these steps ensures a lasting repair.

1. Safety First: Always use proper safety gear, including a harness, on any roof. Work on a dry, calm day and have a spotter on the ground. No repair is worth a fall.
2. Find the Leak Source: Water can travel, so the leak inside may not be directly below the entry point. Check the attic for water stains or mold, and inspect the roof exterior for damage around vents, chimneys, and flashing.
3. Prepare the Surface: This is the most critical step. Thoroughly clean the area of all dirt, debris, and loose granules. Remove any old, cracked sealant or caulk with a putty knife or wire brush. The surface must be completely clean and dry (unless using a wet-patch product). Note: Sealant cannot fix underlying rot or structural damage; these issues must be addressed first.
4. Apply the Sealant: Follow the manufacturer’s instructions. Use a caulk gun for precise beads along seams or a trowel for spreading thicker patch products. For larger holes (over 1/4 inch), use reinforcement fabric embedded between two layers of sealant.
5. Smooth and Cure: Tool the sealant immediately after application for a neat finish and good adhesion. Allow the sealant to dry and cure completely before it’s exposed to heavy rain. Curing time can range from a day to a week, depending on the product and weather.
6. Inspect Your Work: Once cured, check for any gaps or missed spots and reapply if needed.
Following these steps ensures your roof repair sealant provides maximum protection. For more quick-fix strategies, explore our guide on How to Fix a Leaking Roof Fast by Using Simple Solutions.
You’ve learned about sealant types and application, but now let’s cover the practical side: choosing a method and knowing when to call for professional help.
The right application method depends on the sealant’s consistency and the size of the repair. Common techniques include:
For a closer look at the tools for these applications, you can Browse sealant options and application tools.
While a DIY repair can be cost-effective for minor issues, it’s crucial to know when to call a professional.
Cost Considerations: The price of roof repair sealant varies based on type, quantity, and quality. While budget options exist for temporary fixes, investing in a higher-quality sealant matched to your roof saves money long-term by preventing frequent re-applications.
DIY vs. Professional Repair: A DIY approach can work for small, easily accessible repairs like sealing a minor crack. However, a sealant is not a cure-all. Call a professional if you see signs of major damage, such as:
Applying sealant to a roof with structural problems is like putting a band-aid on a broken bone—it won’t solve the underlying issue.
Safety and Warranty: Working on a roof is inherently dangerous, especially on steep pitches or in poor weather. Professionals have the right safety equipment and training. Furthermore, improper DIY repairs can void your roof’s warranty. A professional repair ensures the job is done safely and correctly, protecting your investment.
At Roof Experts, we have over 20 years of experience serving homeowners across Norfolk and Plymouth County. We provide honest assessments and high-quality solutions, from simple sealant applications to major repairs and replacements. If you’re unsure about the extent of your roof damage, it’s always best to get a professional opinion.
For an expert assessment and to understand the true Cost to Fix Roof Leak, reach out to us. We serve Bellingham, Framingham, Taunton, and surrounding communities, providing honest guidance without any pressure.
Contact us today to schedule a roof inspection and get expert advice on your roof repair needs!
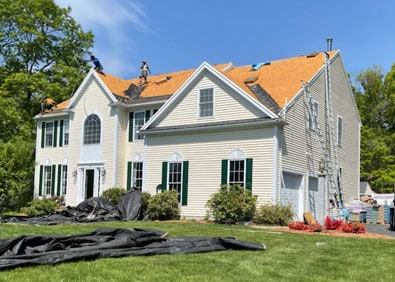
Roof Installations

Roof Replacements
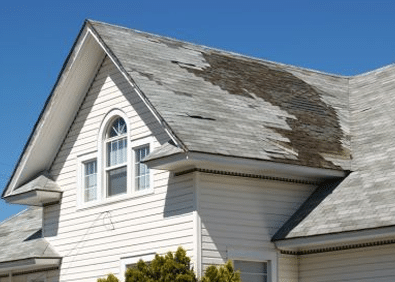
Roof Repairs