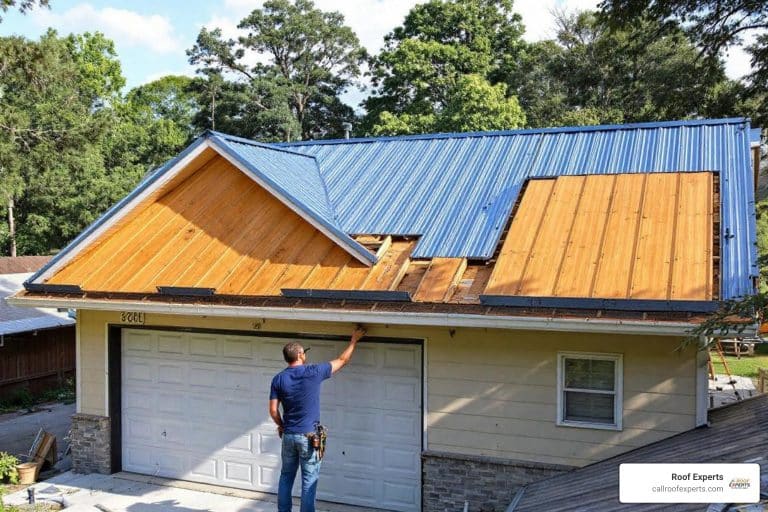
A corrugated garage roof replacement is a practical solution for homeowners dealing with leaks, weather damage, or an aging roof. Here’s a quick overview:
Corrugated roofing is a reliable choice for garages. Its wave-like ridges provide structural strength while channeling rainwater away. Metal panels are the most durable, lasting up to 50 years. Bitumen sheets are an affordable, quiet, and DIY-friendly alternative. Plastic (PVC or polycarbonate) panels let in natural light but may be less durable.
The key to a successful replacement is proper preparation—inspecting your existing structure, choosing the right materials, and following installation best practices.
I’m Jason Hedtler, owner of Roof Experts LLC in Bellingham, MA. I’ve guided countless homeowners through corrugated garage roof replacement projects. From selecting the right panels to ensuring a flawless installation, I know how to protect your investment and keep your garage dry for decades.
 Remove old roof and inspect structure for damage or asbestos, 2) Install underlayment and flashing for moisture protection, 3) Lay corrugated panels with 3-4 inch overlap starting from eaves, 4) Secure with screws every 6-8 inches on ridges, 5) Install ridge caps and seal all seams. Benefits highlighted: corrugations add strength, water sheds easily, panels available in metal (50-year lifespan), bitumen (affordable, quiet), or plastic (lightweight, translucent). - corrugated garage roof replacement infographic pillar-3-steps")
Easy corrugated garage roof replacement glossary:
Before starting your corrugated garage roof replacement, proper planning and material selection are essential to prevent future headaches and leaks. The goal is a dry, secure, and great-looking garage for years to come.
Corrugated roofing’s profile adds strength without extra weight and creates channels for efficient water runoff—a huge plus during heavy New England downpours.
You have several excellent options for your corrugated garage roof replacement. We’ve helped homeowners across our service areas, from Ashland to Franklin, weigh these choices.
| Material Type | Cost (Relative) | Lifespan | Durability | Noise (Rain/Hail) | Installation Ease | Environmental Note |
|---|---|---|---|---|---|---|
| Metal | Medium to High | 20-50+ years (Terne 100+) | Excellent, weather-resistant | Can be loud (mitigable) | Moderate | Often recyclable |
| Bitumen | Low | 15-25 years | Good, flexible, UV-resistant | Low (noise-reducing) | High (DIY-friendly) | Often 50% recycled |
| Plastic (PVC/Polycarbonate) | Medium | 10-20 years | Fair, impact-resistant | Moderate to High | High | Varies by type |
Metal Roofing Sheets: The Long-Haul Champion
Metal panels are popular for their incredible durability, lasting up to 50 years and withstanding extreme weather. They are also lightweight, which benefits your garage’s structure. Potential downsides include noise during rain, heat transfer, and condensation, but these can be managed with proper underlayment, insulation, and ventilation.
Bitumen Roofing Sheets: The DIY-Friendly, Quiet Achiever
Bitumen sheets are an attractive, affordable option. They are lightweight, durable, and stand up to extreme weather. They are also noise-reducing and UV-resistant. Their biggest draw is their DIY-friendliness, as they are simple to install, virtually maintenance-free, and can be used on low-pitched roofs. Many are also made from 50% recycled materials, making them a cost-effective and eco-friendlier solution.
Plastic Roofing Sheets (PVC or Polycarbonate): The Light Bringers
Plastic sheets are great for letting natural light into your garage, which is ideal for workshops. They are lightweight and filter out UV rays. However, they generally aren’t as robust as metal or bitumen, can be prone to scratching, and might be noisier during rain.
A thorough pre-installation check is non-negotiable for safety, compliance, and long-term success.

1. Safety First, Always!
Roof work is risky. Always follow safety requirements. If you’re doing it yourself, use proper personal protective equipment (PPE):
2. The Asbestos Question: Don’t Disturb the Beast
Older corrugated cement sheets, common in areas like Foxboro and Canton, may contain asbestos. If undisturbed, the risk is low. However, drilling, cutting, or breaking them releases harmful fibers. If you suspect asbestos, do not disturb it. We strongly recommend hiring a licensed asbestos removal specialist if removal is necessary.
3. Structural Inspection: The Foundation of Your New Roof
A new roof is only as good as its foundation. Before installing, inspect the roof deck and joists for damage, rot, or insects, and replace any compromised timber. Purlins (horizontal supports) should be no more than 36 inches apart, and trusses no more than 24 inches. The substructure must be aligned and square for the panels to fit correctly.
4. Tools and Materials: Gear Up for Success
Having the right tools makes all the difference. Here’s a list of essentials:
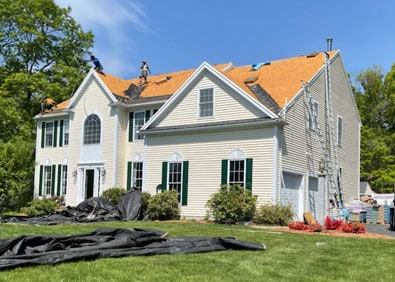
With materials selected and the structure inspected, it’s time to install your new corrugated garage roof replacement. This guide will walk you through the process, focusing on best practices for a watertight, durable finish.

First, carefully remove the old roofing panels, fasteners, and underlayment, being mindful of falling debris and asbestos safety. Once the deck is clear, perform a final inspection. Replace any rotted or damaged joists or decking. Double-check that the roof is square and sweep the surface clean of all debris. A clean, solid base is crucial.
This stage creates your roof’s primary watertight barrier.
Precision here ensures a long-lasting, leak-free roof.
For more detailed visual guidance, check out How to Install Corrugated Roofing: DIY Guide and Expert Tips.
Your corrugated garage roof replacement is almost done. Now let’s cover long-term care and when to call for professional help to protect your investment.
Even the best roofs need occasional attention.
Long-Term Maintenance Requirements:
Common Issues and Mitigation:
Common issues like noise, heat, and condensation with metal roofs can be managed. Proper underlayment, insulation, and good ventilation are the keys to mitigating these problems.
Repair vs. Cladding Alternatives:
Sometimes, a full replacement isn’t necessary. For small leaks, replacing roofing bolts and seals or using a quality silicone sealant can work. If the roof is structurally sound but you want to improve insulation or appearance, internal cladding can be a great option without a full tear-off.
When to Call an Expert:
While a DIY corrugated garage roof replacement is achievable, it’s best to call a professional for:
At Roof Experts, we bring over 20 years of experience to homeowners in Bellingham, Attleboro, and across Norfolk and Plymouth County. Our team ensures high-quality workmanship, compliance with local codes, and provides warranties for lasting peace of mind. If you want the job done right by seasoned professionals, we’re here to help.
Roof Installations
Roof Replacements

Roof Repairs