
How to install new shingles on a roof can seem daunting, but it’s a manageable project with the right steps. Here’s a brief overview to get you started:
Installing new shingles offers several benefits:
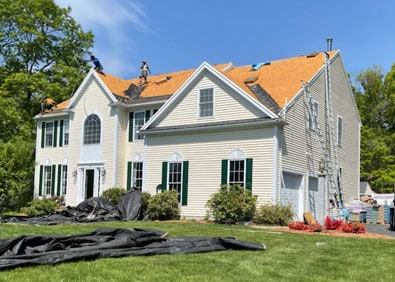
I’m Jason Hedtler, owner of Roof Experts. With over 20 years of experience in roofing, I specialize in helping Massachusetts homeowners understand how to install new shingles on a roof effectively and safely. Let’s dive into the details of mastering this essential home improvement project.

Before you start installing new shingles, prepare your home and surroundings. This pre-installation checklist ensures a smooth and safe roofing project.
Start by mowing your yard. A clean yard helps you spot any roofing debris that falls during the installation. This step not only keeps your yard tidy but also ensures safety.
Move any patio furniture, grills, and other outdoor items away from the house. This protects your belongings from potential damage and makes it easier to clean up after the project.
Take clear pictures of your driveway before any roofing materials or dumpsters are delivered. This documentation is useful if there are any disputes about damage after the project.
Walk around your house and review your landscaping. Flag any concerns like landscape lighting or delicate plants. Consider covering or removing fixtures that are not hardwired to prevent damage.
Identify any exterior power sources you might need for cutting decking or ridge vents. This ensures you have easy access to electricity throughout the project.
Decide on a staging area where materials should be delivered. Common spots include the driveway, side of the house, or garage. Make sure it’s easily accessible for the delivery truck.
Park your cars on the street while the roofing job is in progress. This keeps your vehicles safe from falling debris and allows for easier access to your garage.
Ensure you have access to anything you might need in the garage, such as bikes, tools, or children’s toys. Plan ahead so you won’t need to move items in and out during the project.
Proper ventilation is crucial. Make sure your attic and roof have adequate ventilation to prevent hot air from getting trapped, which can lead to damage over time.
Measure the length of the ridges and hips on your roof. Divide this length by 35 to determine how many bundles of regular or hip-and-ridge shingles you’ll need. This ensures you purchase the right amount of materials.
By following this pre-installation checklist, you can set the stage for a successful and efficient roofing project. Proper preparation not only makes the installation process smoother but also helps in achieving a professional finish.
Next, let’s dig into the details of measuring your roof accurately to ensure you have the right amount of materials.
Accurate measurements are crucial for a successful roof shingle installation. Here’s a simple guide to help you measure your roof correctly and ensure you have the right amount of materials.
Start by measuring the width and length of each section of your roof. Use a measuring tape for precise measurements. Write down the dimensions for each section.
Once you have the width and length, multiply these numbers together to determine the area of each section. For example, if a section is 10 feet wide and 20 feet long, the area is:
10 feet x 20 feet = 200 square feet
Add the areas of all sections together to get the total area of your roof. This is important for calculating the number of shingles you’ll need.
Roofing materials are often sold by the “square,” which is 100 square feet. To find out how many squares your roof requires, divide the total area by 100. For example, if your total area is 2,000 square feet:
2,000 square feet ÷ 100 = 20 squares
Shingles are typically sold in bundles, with three bundles covering one square (100 square feet). To determine how many bundles you need, multiply the number of squares by 3. Using our previous example:
20 squares x 3 bundles per square = 60 bundles
It’s wise to add an additional 10 to 20 percent to account for overage and waste. This covers any mistakes, cuts, or odd-shaped sections of the roof. For instance, if you calculated 60 bundles, adding 15 percent for waste would be:
60 bundles x 1.15 = 69 bundles
By following these steps, you can ensure you purchase the right amount of materials for your roofing project. Accurate measurements not only save money but also prevent delays during installation.
Next, let’s move on to the essential safety precautions you need to take before starting your roofing project.
Before diving into the process of how to install new shingles on a roof, it’s crucial to prioritize safety. Roofing can be dangerous, so taking the right precautions can prevent accidents and injuries.
Wearing the right safety gear is non-negotiable when working on a roof:
Always have a partner or several helpers. They can assist with lifting materials, holding ladders, and providing an extra set of eyes for safety. Teamwork not only makes the job easier but also safer.
Each type of shingle and roofing material comes with specific manufacturer’s instructions. Always follow these guidelines to ensure proper installation and to maintain the warranty. Missteps can lead to leaks or other issues down the line.
By following these safety precautions, you can minimize risks and focus on getting the job done right.
Next, let’s discuss the steps involved in preparing the roof for shingle installation.
Before installing new shingles, properly prepare your roof. This involves removing old shingles, cleaning the roof deck, and ensuring everything is ready for the new materials.
Start by laying tarps on the ground to catch debris. This makes cleanup easier and protects your lawn and landscaping.
Use a roofing fork or shovel to remove the old shingles. Begin at the peak of the roof and work your way down. Insert the fork or shovel under the shingles and pry them up. Be cautious to avoid damaging the roof deck.
Tip: If you encounter stubborn nails, use a hammer to help pry them up.
After lifting the shingles, you’ll need to remove the nails. Use a hammer to pull out any remaining nails. This step ensures that the new shingles will lay flat and secure.
If your roof has metal flashing, such as around chimneys or valleys, you might need to remove it. Carefully pry it up with a hammer or a pry bar. If the flashing is in good condition, you can reuse it. Otherwise, plan to install new flashing later.
Once you’ve removed the shingles and nails, sweep the roof deck clean. This step removes any leftover nails, debris, or dirt that could interfere with the installation of new shingles.
Throughout the process, keep tarps on the ground to catch debris. This helps keep your yard clean and makes disposal easier. After removing the old shingles and nails, gather the tarps and dispose of the debris properly.

By thoroughly preparing your roof, you set a solid foundation for the next steps in how to install new shingles on a roof. Proper preparation ensures that your new shingles will be secure and long-lasting.
Next, let’s move on to installing deck protection and starter shingles.
Once your roof is prepped, the next step in how to install new shingles on a roof is to install deck protection and starter shingles. This stage is crucial for ensuring your roof is weatherproof and durable.
Deck protection is the first layer of defense against the elements. It acts as a barrier between your roof deck and the shingles.
Flashing is essential for directing water away from critical areas like chimneys, vents, and valleys.
Starter shingles provide a solid base for the rest of the shingles and help prevent water from getting under the edges.
By following these steps, you ensure that your roof is well-protected from the elements, setting a strong foundation for the rest of the shingle installation process.
Next, we’ll dive into the detailed steps of how to install new shingles on a roof.
Start laying shingles from the bottom edge of the roof and work your way up and across. This ensures that each row overlaps the one below, helping to shed water effectively.
Proper nailing is crucial for the durability of your roof.
Aligning shingles correctly is key to a professional-looking roof.
When you reach the end of a row, you’ll likely need to cut the last shingle to fit.
Ridge shingles cover the peak of the roof and help prevent leaks.
For areas prone to high winds, you’ll need extra nails.
By following these steps, you can master the process of how to install new shingles on a roof, ensuring a durable and weather-resistant finish. Next, let’s look at the specifics of installing ridge shingles.
Ridge shingles are crucial for sealing the peak of your roof and preventing leaks. Here’s how to install them properly:
By following these steps, you’ll ensure that your ridge shingles are installed correctly, providing a durable and leak-proof finish. Next, let’s address some frequently asked questions about installing new shingles.
1. Remove Existing Shingles: Start by removing the old shingles using a roofing fork or shovel. This makes room for the new shingles and ensures a smooth surface.
2. Clear Debris: Sweep away any leftover nails and debris from the roof deck.
3. Inspect Roof Deck: Check for any damage like water stains or cracks. Repair any issues to ensure a solid foundation.
4. Install Underlayment: Lay down the underlayment, overlapping each row by at least 4 inches. This barrier protects against moisture.
5. Install Shingles: Start with a starter strip along the eaves. Then, lay shingles from the bottom up, overlapping each row.
6. Fit Around Features: Carefully cut and fit shingles around chimneys, vents, and other roof features to ensure a tight seal.
Knowledge and Experience: Replacing a shingle roof requires some roofing knowledge and experience. If you’re a handy homeowner, you might be up for the challenge.
Time and Tools: You’ll need the right tools and a significant amount of time. A 1,000 to 3,000 square foot roof can take a couple of days to complete.
Risk vs. Savings: While doing it yourself can save money, it’s risky. Falling off the roof or causing damage can end up costing more than hiring a professional.
1. Tear Off Old Roof: Remove all old shingles to expose the roof deck.
2. Inspect Decking: Look for any damage and repair it. A solid deck is crucial for a long-lasting roof.
3. Install Drip Edge: Nail the aluminum drip edge to the edge of the roof deck. Leave a 1/2-inch gap between the edge of the deck and the beginning of the drip edge.
4. Cover with Underlayment: Nail down the felt paper, starting from the bottom and overlapping each row by at least 4 inches. This protects against moisture.
5. Waterproof Valleys: Install ice protection underlayment in the valleys to prevent leaks from melted snow and ice.
6. Starter Shingles: Install a starter strip along the eaves. This seals any gaps and provides a base for the first row of shingles.
By following these steps, you can ensure a smooth and efficient shingle installation process. If you’re ever in doubt, it’s best to consult with a professional to ensure the job is done correctly and safely.
Installing new shingles on your roof is a task that can significantly improve your home’s energy efficiency, curb appeal, and overall protection. While the process can be intricate and time-consuming, the benefits are well worth the effort.
At Roof Experts, we take pride in providing top-notch roofing services to homeowners in Bellingham, MA, and the surrounding areas. With over 20 years of experience, our team is dedicated to delivering high-quality workmanship and exceptional customer service.
Why Choose Roof Experts?
If you’re considering installing new shingles or need any roofing services, don’t hesitate to reach out to us. We are here to help you every step of the way, ensuring your home remains safe and beautiful for years to come.
Learn more about our roof installation services and find how Roof Experts can help you with your next roofing project.
Your roof is our top priority. Let us show you the difference that quality and experience can make.
Roof Installations

Roof Replacements

Roof Repairs