
Emergency Roof Tarping is a temporary protective measure to prevent water damage, mold, and structural issues after your roof is compromised. Here’s what you need to know:
Quick Answer: Emergency Roof Tarping Essentials
When a storm hits, your roof takes the brunt of the damage. Without immediate protection, a small leak can escalate into thousands of dollars in interior damage. Water soaks into insulation, drips through ceilings, stains walls, ruins belongings, and creates the perfect environment for mold and rot.
During Hurricane Ian, Florida’s “Operation Blue Roof” provided emergency tarps to thousands of homes, demonstrating that tarping is essential for protecting your property until permanent repairs can be made.
Most homeowner insurance policies require you to take immediate steps to mitigate damage after an incident. Emergency tarping fulfills this requirement, giving you time to schedule proper repairs without your home deteriorating.
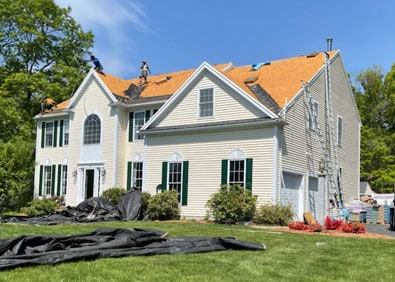
As Jason Hedtler, owner of Roof Experts LLC in Bellingham, MA, I’ve helped countless homeowners protect their properties through Emergency Roof Tarping after severe weather events. Our team understands that when disaster strikes, a properly installed tarp can mean the difference between a manageable repair and catastrophic interior damage.

When disaster strikes your roof, every minute counts. The faster you get protection in place, the less water damage your home’s interior will suffer. At Roof Experts, we’ve seen how quick action saves homeowners thousands of dollars in additional repairs.
While we always recommend calling professionals for Emergency Roof Tarping (it’s safer and more effective), we also understand that sometimes you need to act immediately. That’s why we’re sharing our professional approach to tarping a roof the right way.
Your safety matters more than your roof. We’ve been in the roofing business for over 20 years, and we’ve never seen a situation where risking your life was worth it.
Never climb onto your roof during active storms, heavy rain, high winds, or icy conditions. Wet roofs are incredibly slippery and dangerous. Even experienced roofers wait for safe conditions; your family can’t replace you.
Inspect your roof from the ground, using binoculars if possible. Look for missing shingles, holes, or punctures. Also, check inside for water stains on ceilings or walls to pinpoint the leak’s location.
If you use a ladder, ensure it’s sturdy and secured, with a helper holding the base. Always maintain three points of contact. Steep roofs are not a DIY job. If your roof’s pitch seems unsafe, call a professional.
This is not a one-person job. You need a helper for safety and to manage the large tarp, especially in wind.
Once it’s safe, gather all your supplies beforehand to make the job faster and safer.
You’ll need:

Think of this as preparing a wound before applying a bandage—you need a clean surface.
Carefully clear away all debris from the damaged area: broken shingles, branches, leaves, and loose nails. Anything that could puncture the tarp or prevent it from lying flat must be removed. Use a broom or leaf blower, being cautious around sharp objects.
Even a small twig can compromise the tarp. Rushing this step can cause the tarp to fail, so take your time.
The goal is a smooth, clean surface for a tight seal. This prevents water from pooling and keeps wind from getting underneath the tarp.
Proper positioning is key to a successful Emergency Roof Tarping installation.
Measure the damaged area. Your tarp must extend at least four feet past the damage on all sides. This critical overlap ensures full coverage and allows for secure anchoring.
On sloped roofs, position the tarp from the peak down toward the eaves. This uses gravity to help shed water, mimicking how shingles work.
Unfold the tarp over the damaged section, centering it and smoothing it out to minimize wrinkles.
The top edge anchor is your foundation. Wrap the top edge of the tarp around a 2×4 a few times. Sandwich this with a second 2×4 and nail or screw the boards together. Ensure fasteners penetrate the tarp, shingles, and roof decking.

A loose tarp is a useless tarp. Now it’s time to ensure it protects your home.
Once the top edge is anchored, pull the tarp taut over the damaged area, like a drum. This prevents sagging where water could collect and helps it resist wind.
Avoid wrinkles and air pockets, as they are weak points where water can pool and wind can get underneath.
Repeat the anchoring process for the bottom and side edges. Wrap the tarp around a 2×4, sandwich it with another, and nail or screw them down, spacing fasteners no more than 10 inches apart.
Ensure your nails or screws penetrate deep enough to grip the roof’s structure. This board-and-sandwich method is superior to sandbags and holds up against harsh weather, which is why professionals use it.
If you’re in an especially windy area or expecting more severe weather, consider adding extra 2x4s running perpendicular across the tarp. These help prevent snow and rain accumulation and add another layer of stability.

Before you finish, one final task will help with your insurance claim.
Take photos and videos of everything. Document the initial damage and your completed work. Capture clear images showing how the tarp is secured and what it covers. This proves to your insurer that you acted to prevent further damage.
Keep all receipts for materials (tarp, 2x4s, nails, etc.). Most homeowner policies reimburse these emergency mitigation costs.
Emergency Roof Tarping is a temporary solution. A properly installed tarp can last up to 90 days, buying you time to arrange permanent repairs. Do not leave a tarp on for months.
Contact a professional roofing contractor as soon as possible for a thorough inspection and to schedule permanent repairs. At Roof Experts serving Bellingham, MA, and throughout Norfolk and Plymouth County, we provide detailed assessments and guide you through the entire repair or replacement process. We’ve been doing this for over 20 years, and we know how to work with insurance companies to make your claim process as smooth as possible.
Most homeowner policies cover emergency mitigation efforts like tarping, especially when you document everything properly. Insurance companies actually appreciate homeowners who take proactive steps to prevent additional loss. It shows responsibility and often makes the claims process faster.
For additional guidance on temporary roof protection, GAF offers helpful information in their guide on what to know about tarping a roof.
You’ve installed an emergency tarp, but the work isn’t done. The next steps in your Emergency Roof Tarping process are crucial for a smooth recovery.
Even the best-installed tarp is not a permanent solution. Like a bandage, it protects temporarily but doesn’t fix the underlying issue.
A common mistake is using a flimsy tarp. Cheap tarps secured with bricks often fail within hours or days, leaving your roof exposed again.
Another mistake is leaving the tarp on too long. While it can last up to 90 days, this is a maximum. Prolonged exposure to weather and UV rays causes deterioration, and your insurer may question delays in permanent repairs.
Check your tarp periodically, especially after storms. Look for tears, loose fasteners, or pooled water, which adds stress. Address any issues immediately or call us for an inspection.
Now, let’s talk about when DIY just doesn’t make sense. While our guide is for emergencies, there are times when attempting to tarp your own roof is genuinely dangerous or impractical.
Call a professional if your roof is steeply pitched, high, or has complex features. Extensive damage or potential structural issues also require an expert. If you lack the confidence or time, calling a pro is the safest choice.
Over our 20+ years, we’ve seen DIY attempts worsen damage by channeling water into new areas. Calling for professional help is the smart, safe choice.
Your insurance policy likely covers professional tarping services. Most policies require you to mitigate further damage and will reimburse you for these efforts.
Insurance adjusters often use software like Xactimate to standardize estimates. This means professional tarping costs are built into the insurance system, and your carrier has standard rates for them. For a deeper understanding, you can review resources like Xactimate Demystified.
Many policies allow up to 1% of your total policy value for temporary repairs. With professional Emergency Roof Tarping typically costing between $300 and $1,000, it’s usually well within what your policy covers.
While DIY materials cost $150-$350, professional service offers significant advantages. Our trained crews use proper safety equipment, spot problems you might miss, and complete the work quickly, often within 24 hours. We also provide proper documentation for your insurance claim, which can streamline the process.
When you compare DIY versus professional tarping, the choice is clear. DIY has lower material costs but involves significant safety risks, time investment, and potential for error. Professional service, while costing more upfront, is typically covered by insurance, eliminates safety risks, is fast, and provides an expert installation that insurers accept.
Here in Bellingham, MA, and throughout Norfolk and Plymouth County, we’ve built our reputation on being there when homeowners need us most. When a storm damages your roof at 2 AM, you need a team you can trust to respond quickly and get the job done right. That’s exactly what we deliver—every single time.
For more information about how we can help protect your home after storm damage, visit our page on emergency roof tarping services. Whether you decide to tackle the tarping yourself or call in the professionals, the most important thing is acting quickly to protect your home from further damage. Your roof—and your peace of mind—are worth it.
Roof Installations

Roof Replacements

Roof Repairs