Chimney flashing replacement is necessary when the metal seal around your chimney fails, allowing water to penetrate your roof. If you’ve noticed water stains on your ceiling near the chimney, the culprit is almost always the flashing—the thin metal pieces that create a waterproof seal where your chimney meets your roof.
Quick Answer: When to Replace Chimney Flashing
Cost: Resealing runs $150-$425; full replacement costs $750-$1,450
Signs of Failure: Water stains on ceilings, rust on metal, visible gaps in caulking, discolored bricks
Lifespan: Properly installed flashing lasts up to 30 years
Best Practice: Always replace flashing when installing a new roof
DIY vs. Pro: Complex project requiring roof work expertise and safety equipment
Chimneys are a primary cause of roof leaks. The problem isn’t always obvious from the ground, but signs like rust in your firebox, discolored bricks, or gaps in the caulking are clear warnings. Years of weather exposure and temperature changes cause flashing to fail. Even if flashing looks okay, porous brick and mortar can become saturated during prolonged rain, leading to interior leaks.
I’m Jason Hedtler, owner of Roof Experts LLC in Bellingham, MA. In my experience, catching these issues early and fixing them correctly saves homeowners thousands in water damage repairs.
Chimney flashing is a system of metal barriers that forms a watertight seal where your chimney meets your roof, directing water away from this vulnerable intersection. It typically includes three parts:
Base Flashing: The lowest piece at the front of the chimney that extends onto the roof.
Step Flashing: L-shaped pieces interwoven with shingles along the chimney’s sides.
Counter Flashing: An upper layer embedded into the chimney’s mortar joints that covers the step flashing.
Without properly installed flashing, water can seep into your attic, causing wood rot, mold growth, and compromised structural integrity. Neglecting its maintenance can lead to expensive repairs. If you suspect a leak, check out our roof leak detection services.
Telltale Signs Your Chimney Flashing Needs Replacement
Identifying flashing issues early saves stress and money. Here are the key warning signs that you may need a chimney flashing replacement:
Water Stains: Stains on ceilings or walls near the chimney are a clear sign of a leak.
Water in Firebox: Puddles or rust stains inside your firebox can point to a flashing or chimney cap issue.
Damaged Shingles: Missing or cracked shingles around the chimney expose the flashing to damage.
Visible Gaps or Cracks: Any separation where the flashing meets the chimney or roof is a potential entry point for water.
Rusted or Bent Metal: Corrosion, rust, or bent flashing indicates it has failed and needs replacement.
Deteriorated Caulk: Cracked or peeling caulk or roofing cement is a sign that a temporary fix has failed and the underlying flashing is compromised.
Damaged Mortar Joints: Crumbling mortar around the chimney can allow water to get behind the flashing system.
Your Complete Guide to Chimney Flashing Replacement
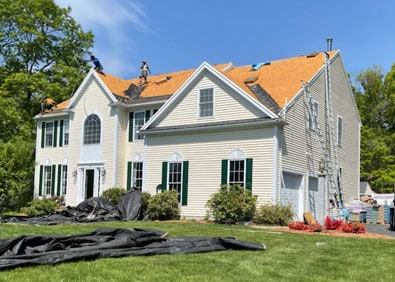
While a DIY approach to home repairs can be appealing, chimney flashing replacement is a complex and dangerous job best left to professionals. It requires an understanding of how water moves, how roofing materials interact, and most importantly, how to work safely on a sloped surface several stories high.
At Roof Experts, our 20 years of experience have shown us the risks of improper roof work. A fall can be life-altering. Beyond safety, the complexity of the job varies with roof pitch and chimney type (brick, sided, stone), each requiring specialized techniques. A small mistake in a DIY installation can lead to leaks and costly repairs that exceed the price of hiring a professional in the first place.
Essential Tools, Materials, and Safety Precautions
Professional chimney flashing replacement requires specific equipment. This is not a casual weekend project.
Tools: You’ll need a pry bar, utility knife, tin snips, wire brush, hammer, roofing nails, caulk gun, and measuring tools. For brick chimneys, a grinder with a diamond blade is necessary to cut into mortar joints.
Materials: Common flashing materials include galvanized steel, copper, and aluminum. The most critical material is a self-adhering ice and water shield, which creates a waterproof barrier on the roof deck. You will also need polyurethane caulk, roofing cement, and replacement shingles.
Safety Equipment: Safety is paramount. Never work on a roof without a sturdy, properly secured ladder, a personal fall arrest system (harness, lanyard, anchor), non-slip footwear, safety glasses, and heavy-duty gloves. Always work with a partner and only in dry, calm weather conditions.
Step-by-Step: Replacing Flashing on Brick and Sided Chimneys
The process for chimney flashing replacement is methodical. Each step builds on the last to create a watertight system.
Inspect and Prepare: Examine the existing flashing, roof decking, and chimney masonry for damage. Carefully remove the old flashing and surrounding shingles. For sided chimneys, a section of siding must be removed. Scrape the surface clean of all old caulk, cement, and debris.
Install Ice and Water Shield: Apply this self-adhering membrane to the clean roof deck around the chimney, extending it up the chimney wall. This is your secondary water barrier.
Install Base and Step Flashing: Re-shingle up to the chimney base and install the front base flashing. Then, weave L-shaped pieces of step flashing with each course of shingles along the chimney’s sides. Each piece must overlap the one below it to shed water effectively.
Install a Cricket (If Needed): For chimneys wider than 30 inches, a cricket (a small peaked structure) should be installed behind the chimney to divert water.
Install Counter Flashing: The final step varies by chimney type.
For Brick Chimneys: Cut a groove into the mortar joints using a grinder. Insert the counter flashing into the groove, bend it down over the step flashing, and secure it. Seal the groove with polyurethane caulk.
For Sided Chimneys: Reinstall the siding, leaving at least a 1/4-inch gap between the bottom of the siding and the roof shingles to allow for proper drainage.
Final Seal and Inspection: Apply a final bead of caulk to all seams and joints. Inspect the entire system to ensure all pieces are aligned, overlapped, and secured correctly. For a visual guide, see this resource from Family Handyman.
Integrating Flashing with Shingles and Underlayment
Proper chimney flashing replacement is about creating an integrated water management system. The core principle is layering, where each component overlaps the one below it to ensure water always flows down and off the roof.
The system starts with the roof deck, which is protected by underlayment. The ice and water shield provides a superior, self-sealing waterproof barrier in the most critical area around the chimney. The base flashing, step flashing, and counter flashing are then layered with the shingles to create a continuous, impenetrable shield.
Small details are crucial. A chimney cricket is essential for wide chimneys to prevent water and debris from pooling. Kickout flashing is used where a roof meets a wall to divert water away from the wall and into the gutter. When installed correctly, this integrated system protects your home from water intrusion for decades.
After the Fix: Costs, Maintenance, and Professional Guidance
Once your chimney flashing replacement is complete, you gain peace of mind knowing one of your roof’s most vulnerable spots is secure. This is an investment in your home’s long-term value and structural integrity.
Repair vs. Replace: Making the Right Decision
Homeowners often ask if they can just patch a flashing leak. The answer depends on the condition of the flashing.
Resealing ($150 – $425): This may be an option for minor gaps in the caulking if the metal itself is still in good shape. However, sealants are a temporary fix and will deteriorate over time.
Replacement ($750 – $1,450): If you have an active leak or the flashing shows widespread rust, corrosion, or damage, a full chimney flashing replacement is the only reliable solution. It’s also best practice to replace flashing whenever you install a new roof to ensure both systems have the same lifespan—up to 30 years.
While replacement costs more upfront, it prevents far more expensive water damage repairs down the line. For more information, see our page on roof flashing repair.
Chimney Flashing Replacement Costs and Long-Term Care
Several factors influence the cost of a professional replacement, including chimney size, material choice (e.g., copper vs. galvanized steel), roof pitch, and accessibility. If we find rotted roof decking or deteriorated masonry, those repairs will add to the total cost but are essential for a lasting solution.
To protect your investment, inspect your flashing at least once a year (fall is ideal) and after any severe weather. You can often spot issues like bent metal or visible gaps from the ground with binoculars.
Why Professional Installation Matters
Chimney flashing replacement is a complex job where small mistakes lead to big leaks. A professional installation is critical for several reasons:
Expertise: At Roof Experts, we have over 20 years of experience in Bellingham, MA, and the surrounding Norfolk and Plymouth Counties. We understand how to create a durable, watertight system that complies with all local building codes, following guidelines from organizations like the NRCA.
Safety: Working on a roof is inherently dangerous. Our team is fully trained and equipped with proper fall protection to perform the job safely, eliminating the risk to you.
Durability: A professionally installed flashing system can last up to 30 years. We identify and address underlying issues, like a damaged chimney crown or poor underlayment, to prevent future problems.
Don’t let failing chimney flashing compromise your home. If you’re experiencing leaks or want the peace of mind that comes with a professional inspection, reach out to Roof Experts for a free estimate. If your roof needs more comprehensive work, you can also schedule your professional roof replacement directly.
About Roof Experts
Superior Roofing Services
Roof Installations
We specialize in professional new roof installations tailored to meet the unique needs of each homeowner in the Bellingham, MA area. Our expert team utilizes the latest materials and techniques to ensure your new roof not only looks great but also provides superior protection for your home. With over 20 years of industry experience, we commit to excellence in every project, guaranteeing a durable and aesthetically pleasing roof that enhances the value and safety of your property. Roof Experts is dedicated to honesty, quality, and satisfaction, making us the trusted choice for roofing solutions.
Whether due to age or weather damage, Roof Experts provides reliable roof replacement services designed to restore the integrity and appearance of your home. Operating out of our base at 235 Maple St Suite 8, Bellingham, MA, our skilled roofers carefully assess your current roof to recommend the best solutions. We prioritize high-quality materials and meticulous craftsmanship to ensure your new roof stands the test of time, while maintaining our commitment to exceptional customer service. Every project is handled with care and precision.
Roof Experts understands the urgency and importance of prompt roof repairs. Serving homeowners in both Franklin and Bellingham, MA, our experienced team is equipped to handle a wide range of roof repair needs, from minor leaks to significant damage. We focus on delivering quick, effective solutions that prevent further damage and protect your home. Trust Roof Experts's two decades of expertise to provide dependable repairs that ensure your roof remains in optimal condition. Customers know they can rely on us for fast service and strong results.