Shingling a roof is a crucial task for maintaining your home’s durability and aesthetics. It involves carefully layering shingles to ensure long-lasting protection against the elements. Whether you’re a Massachusetts homeowner in Bellingham or Franklin, understanding the basics of roofing can help you make informed decisions about your next project.
My name is Jason Hedtler, and with over two decades of roofing experience, I’ve seen the significance of expertly shingling a roof. At Roof Experts, we’re dedicated to delivering top-tier roofing services, ensuring your home stands strong against Massachusetts weather.

Shingling a roof glossary:
– how to replace damaged roof shingles
– shingle roof replacement
Before starting your roofing project, prepare your home and surroundings. This will ensure a smooth and efficient shingle installation process.
Begin by mowing the yard. A tidy yard makes it easier to spot and collect any roofing debris that might fall during the installation. It also helps prevent any accidents that could occur from hidden materials.
Move any patio furniture and outdoor items away from the house. This protects them from potential damage and makes room for the roofing crew to work.
Inspect your landscaping for any delicate fixtures, like landscape lighting, that might be at risk. Consider covering or removing anything that could be easily damaged.
Identify any exterior power sources that might be needed for tools, such as cutting decking or ridge vents. This ensures that the crew has access to electricity as needed.
Choose a staging area for the delivery of roofing materials. This could be the driveway, side of the house, or even the garage. Having a designated spot helps keep the project organized.
Make sure you have easy access to your garage. Whether it’s for retrieving tools or accessing vehicles, you don’t want to be blocked out during the project.
Proper ventilation is vital to prevent hot air from getting trapped in your home. Check your attic and roof vents to ensure they are clear and functioning correctly.
Finally, measure the ridge caps. To do this, measure the length of the ridges and hips on your roof. Divide the total length by 35 to determine how many bundles of ridge shingles you will need.

By following this checklist, you can help ensure a safe and efficient roofing installation. This preparation is crucial for a successful shingle installation, especially in the Massachusetts climate. Next, we’ll dive into how to measure your roof accurately to ensure you have the right amount of materials.
Accurate measurement is key to a successful roofing project. It ensures you purchase the right amount of materials, saving both time and money. Here’s how to get it right:
Start by measuring the width and length of each section of your roof. Use a tape measure, and be as precise as possible. If your roof is complex with many angles, break it down into smaller, manageable sections. This will help in calculating the total area more accurately.
Once you have the measurements, multiply the width and length of each section to find its area. Add up the areas of all sections to get the total square footage of your roof. This total area is essential for determining how many shingles you’ll need.
Roofing materials are often sold by the “square,” which equals 100 square feet. To find out how many squares you need, divide the total area of your roof by 100. This will give you the number of squares required for your project.
Shingles are typically packaged in bundles, with three bundles covering one square. To calculate how many bundles you need, multiply the number of squares by 3. This ensures you have enough shingles to cover the entire roof.
It’s wise to purchase extra materials to account for overage and waste. Plan for an additional 10% to 20% over your calculated needs. This extra amount covers mistakes, cuts, and any future repairs you might need.
By following these steps, you’ll ensure that you have the right amount of materials for your roofing project. Accurate measurements not only help in budgeting but also streamline the entire installation process.
Next, we’ll discuss the importance of safety gear and how to protect yourself while working on your roof.
When it comes to shingling a roof, safety should always be your top priority. Working on a roof can be dangerous, so it’s crucial to equip yourself with the right safety gear and follow best practices. Here’s what you need to know to stay safe:
Never work alone when shingling a roof. Having a partner or team of helpers can make the job safer and more efficient. They can assist with lifting materials, provide tools, and watch out for potential hazards.
By following these safety guidelines, you can minimize risks and focus on completing your roofing project efficiently. Safety is not just about wearing the right gear—it’s about being aware, prepared, and cautious at all times.
Next, we’ll dive into the steps for preparing your roof, including removing old shingles and setting the stage for a successful installation.
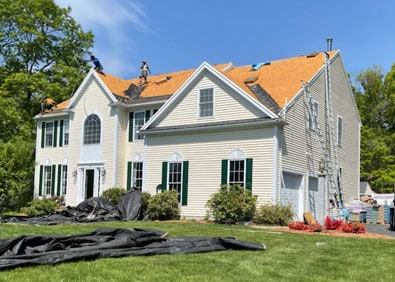
Before diving into the installation of new shingles, prepare your roof carefully. This step sets the foundation for a successful roofing project and ensures the longevity of your new shingles. Let’s break down the process.
The first task is to remove the old shingles. This is where a roofing fork or shovel becomes your best friend. Slide the tool under the shingles and gently pry them up. Be patient and work systematically to avoid damaging the underlying roof deck.
Pro Tip: Lay tarps on the ground to catch debris. This makes cleanup easier and protects your lawn and garden from nails and shingle pieces.
As you remove the shingles, you’ll encounter plenty of old nails. Use a hammer to pry up these nails, ensuring the surface is smooth and ready for new materials. This step is crucial, as leftover nails can puncture new shingles or underlayment.
If your roof has metal flashing, especially around chimneys or valleys, you’ll need to remove it cautiously. Flashing is often secured with nails, so use your hammer to gently lift it away. Keep the flashing in good condition if you plan to reuse it, or replace it if it’s damaged.
Once all shingles and nails are removed, it’s time to sweep the roof deck. This step clears away any remaining debris, ensuring a clean surface for the new underlayment and shingles. A clean deck is crucial for proper adhesion and waterproofing.
Quick Tip: Use a broom with stiff bristles to effectively remove small debris and dust.
With the roof deck clean and free of debris, you’re ready to move on to the next phase of your project. This preparation work might seem tedious, but it’s vital for a durable and leak-free roof.
In the next section, we’ll explore how to install deck protection and starter shingles, laying the groundwork for a weather-resistant roof.
Now that your roof is prepped, it’s time to start building a solid foundation for your new shingles. This involves installing deck protection and starter shingles. These components are crucial for keeping your home safe from the elements.
Deck protection acts as a barrier between your roof deck and the shingles. It helps keep water out and extends the life of your roof. Start by laying a shingle underlayment over the roof deck. This underlayment can be either an asphalt-saturated felt or a synthetic material, both offering excellent protection.
Use chalk lines to guide your placement and ensure your rows are straight. Secure each row with cap nails, overlapping them by 3 to 4 inches. This overlapping technique is key to creating a waterproof barrier.
For those in areas prone to heavy rain or snow, consider adding a leak barrier protector. This extra layer provides additional defense against water infiltration, especially in vulnerable areas like valleys and eaves.
Next, install the drip edge along the eaves. This metal flashing directs water away from the fascia and into the gutters, preventing damage to your home’s structure. Use roofing nails to secure the drip edge, ensuring a snug fit.
With the deck protection and drip edge in place, it’s time to lay the starter shingles. These are the first line of defense against water leaks and are installed at the edges of the roof. The starter shingles should overhang the drip edge by about 1/4 inch.
Nail them down carefully, ensuring each nail is placed above the adhesive strip. This placement helps the shingles adhere properly and resist wind uplift.
Finally, address any areas where water might seep in, like around chimneys or where the roof meets a wall. This is where flashing comes in. Use metal flashing in these spots, securing it with nails and covering each nail with the next piece of flashing to keep water out.
With these steps complete, your roof is now ready for shingle installation. This foundational work ensures your roof will stand strong against the elements for years to come. Next, we’ll dive into the process of laying the shingles themselves.
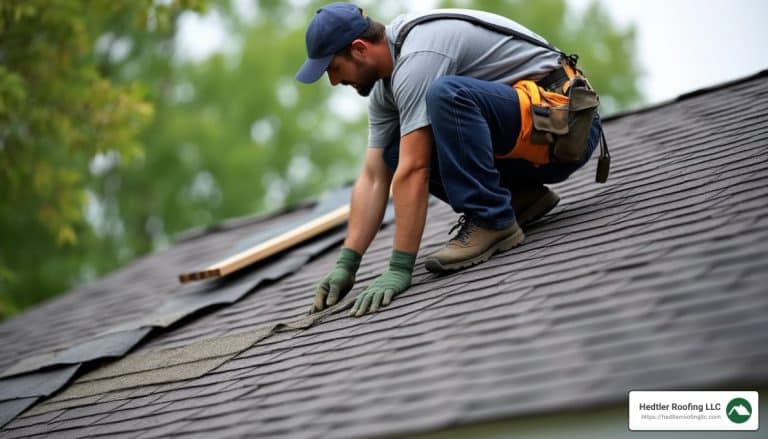
Now that your roof is prepped with deck protection and starter shingles, it’s time to dive into the main event: shingling a roof. This process involves several critical steps, each contributing to a durable and weather-resistant roof.
Nailing might seem straightforward, but it’s crucial for securing shingles properly. Use 1-1/4-inch zinc-coated roofing nails. Each shingle should be held by four nails, but in areas prone to high winds, six nails are recommended. Place the nails about 2 inches from each end of the shingle and an inch above each cutout. This ensures the nails hold the top edge of the shingle underneath, providing a secure fit.

Begin by lining up the first full shingle against the starter strip. Maintain a straight line using chalk lines as guides. This helps keep the shingles aligned, preventing water from seeping through any gaps. As you reach the end of a row, you may need to cut the last shingle to fit. Always use a sharp utility knife for clean cuts, and make sure no part of the roof deck is exposed.
When you reach the roof ridge, you’ll need to bend shingles over it. This technique involves folding the shingle so that each side is equal. Secure it with a nail on each side. Continue this process until you reach the edge of the ridge. This step is vital for ensuring that the ridge is well-protected from water and wind.
Correct nail placement is key to wind resistance. Nails should be driven straight, not at an angle, to ensure they hold the shingle securely. Misplaced or angled nails can lead to shingles lifting during strong winds, which is a common issue in Massachusetts.
Tip: Avoid aligning the seams of shingles in consecutive rows. Instead, offset each row by about 6 inches to prevent water from easily finding its way through the seams.
By following these steps and paying attention to detail, you can ensure that your roof is not only aesthetically pleasing but also robust and ready to withstand the elements. Next, we’ll explore some special considerations to keep in mind when dealing with unique roof features.
When you’re shingling a roof, some parts need extra attention. Let’s look at the special areas that require careful planning and execution to ensure your roof stays leak-free and durable.
Pipes and vents are common roof penetrations. They must be sealed properly to prevent leaks. Use metal flashing around these areas. Flashing acts as a barrier, directing water away from the openings. Make sure the flashing is snug and sealed with a high-quality sealant.
Chimneys are another tricky spot. They need to be flashed with precision. Start by installing a metal step flashing, which should be at least 5 inches high and 5 inches wide. Each shingle course should cover the step flashing. This ensures water is directed away from the chimney. For added protection, use an ice and water protector membrane around the base.
Valleys, where two roof planes meet, are prone to leaks if not handled properly. IKO recommends using open metal valleys for better performance. Line the valleys with a 28-gauge galvanized metal. This provides a smooth path for water to flow away from the roof. Place an ice and water protector membrane underneath for added security.
Flashing is crucial wherever the shingle layer is interrupted. This includes areas around skylights, dormers, and where the roof meets walls. Use step flashing in these areas to prevent leaks. Ensure the flashing is overlapped and sealed with a water-resistant sealant.
In Massachusetts, ice dams are a common issue. They form when snow melts and refreezes at the roof edge, causing water to back up under the shingles. To protect against this, install an ice and water protector membrane along the eaves. This provides a secondary layer of protection, preventing water from seeping into the roof deck.
Underlayment acts as a barrier between your shingles and the roof deck. It protects against water and ice. Options include synthetic underlayment and traditional felt paper. Choose based on your specific needs and climate conditions. The underlayment should be installed from the bottom up to ensure proper overlap and protection.
Apart from the primary shingles, having a secondary layer like IKO’s RoofGard-Cool Grey Synthetic Roof Underlayment can add an extra shield against harsh weather. This layer is crucial for extending the life of your roof by preventing moisture infiltration.
By paying attention to these special considerations, you ensure your roof is well-protected against leaks and weather damage. Next, we’ll address some frequently asked questions about the roofing process.
Shingling a roof involves several key steps to ensure a durable and weather-resistant finish:
For detailed guidance, refer to resources like IKO Roofing’s Guide for step-by-step instructions.
While it is possible to shingle a roof yourself, it is not recommended unless you have experience and the right safety equipment. Roofing work is dangerous. It involves working at heights and requires a good understanding of roofing techniques to avoid leaks and other issues. If you’re in Massachusetts, it’s best to hire a professional like Roof Experts, who are trained and equipped for the job. They ensure the work meets local building codes and safety standards.
The number of squares a roofer can install in a day varies based on several factors:
On average, a team of roofers might install 10 to 12 squares per day under typical conditions. However, this can vary, so it’s best to consult with your roofing contractor for a more accurate estimate based on your specific project.
Understanding these aspects of shingling a roof helps homeowners in Massachusetts make informed decisions. Next, we’ll explore how Roof Experts can assist you with your roofing needs.
At Roof Experts, we pride ourselves on serving homeowners in Massachusetts with the highest standards of roofing solutions. With over 20 years of experience, our team specializes in roof installations, replacements, and repairs. We focus on delivering high-quality workmanship and exceptional customer service to the Franklin and Bellingham areas.
Why Choose Roof Experts?
For homeowners in Massachusetts, choosing a reliable roofing partner is crucial. Whether you need a detailed inspection, a simple repair, or a complete roof replacement, Roof Experts is here to help. Experience the peace of mind that comes with knowing your home is in capable hands.
Ready to upgrade your roof? Contact us today for a consultation and find how we can improve the safety and beauty of your home.
Roof Installations

Roof Replacements

Roof Repairs