[et_pb_section fb_built=”1″ admin_label=”section” _builder_version=”4.16″ global_colors_info=”{}” theme_builder_area=”post_content”][et_pb_row admin_label=”row” _builder_version=”4.16″ background_size=”initial” background_position=”top_left” background_repeat=”repeat” global_colors_info=”{}” theme_builder_area=”post_content”][et_pb_column type=”4_4″ _builder_version=”4.16″ custom_padding=”|||” global_colors_info=”{}” custom_padding__hover=”|||” theme_builder_area=”post_content”][et_pb_text admin_label=”Text” _builder_version=”4.27.4″ background_size=”initial” background_position=”top_left” background_repeat=”repeat” hover_enabled=”0″ global_colors_info=”{}” theme_builder_area=”post_content” sticky_enabled=”0″]
Roof flashing repair plays a crucial role in safeguarding your home from water damage and leaks. It’s the thin, moisture-resistant metal that redirects water away from areas on your roof where leaks might occur, such as chimneys, vents, and skylights. Without proper maintenance or repair, your home’s structural integrity could be compromised, leading to costly damages.
I’m Jason Hedtler, proud owner of Roof Experts with experience in roof flashing repair. Our team delivers top-notch roofing solutions to Massachusetts homeowners, ensuring your roofs are durable and aesthetically pleasing.

Handy roof flashing repair terms:
– ceiling leaking water
– handyman roof repair
– leaking roof
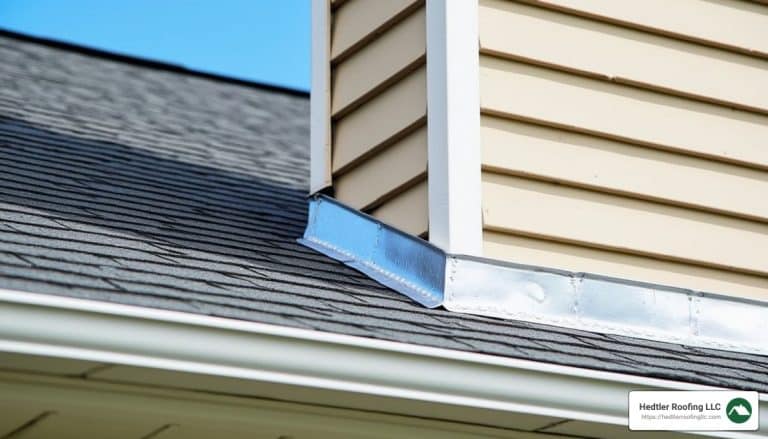
Roof flashing is a crucial component in protecting your home from water damage. It consists of thin, moisture-resistant materials designed to redirect water away from vulnerable areas on your roof. These areas include chimneys, vents, skylights, and any place where the roof meets a vertical surface, like walls or dormers. Without effective flashing, water can seep into your home, leading to leaks and structural damage.
Understanding the different types of roof flashing can help you identify potential problem areas and ensure your roof is properly protected:
Choosing the right material for roof flashing is essential for durability and effectiveness. Here are some common materials used:
Each material has its advantages, and the choice often depends on your specific needs and local building codes.
Roof flashing is a vital part of your home’s defense against water damage. However, like all materials exposed to the elements, it can deteriorate over time. Recognizing the signs that your roof flashing repair is needed can save you from costly damage down the line.
One of the most obvious signs of flashing issues is water leaking into your home. If you notice water stains on your ceilings or walls, especially after a heavy rain, your flashing might be compromised.
Pro Tip: After a storm, check your attic for wet insulation or damp spots. Leaks often show up there first.
Flashing is typically made of metal, which means it can rust or corrode over time, particularly if it’s not properly coated or if it’s made of a less durable material like plain aluminum. Look for rust stains around your roof’s edges or near any metal flashing components. Rust not only weakens the metal but also indicates potential water ingress points.
Flashing is supposed to create a seamless barrier against water. If you see visible gaps between the flashing and the roof surface, or if the flashing appears lifted or detached, it’s a clear sign that repairs are needed. Gaps can allow water to seep in, leading to leaks and potential structural damage.
Certain areas of your roof are more prone to flashing problems. Here’s where to keep an eye out:

By staying alert to these signs and regularly inspecting the common areas for flashing issues, you can prevent minor problems from turning into major headaches. In the next section, we’ll explore how to repair roof flashing effectively, whether you’re considering a DIY approach or hiring a professional.
Repairing roof flashing involves several key steps. Each step ensures that the flashing remains watertight and your home stays protected from water damage.
1. Remove Shingles
To start a roof flashing repair, gently pry up the shingles surrounding the damaged flashing. This step is crucial because it allows access to the flashing without causing unnecessary damage to the shingles. Be careful, as shingles can be brittle and prone to breaking.
2. Address Minor Repairs
Once the shingles are removed, inspect the flashing for minor issues like small holes or corrosion. For small holes, roughen the edges around the hole, apply a flashing patch, and secure it with roofing cement. If the flashing is severely corroded, replacement is necessary.
3. Remove Fastening Materials
Carefully remove any nails, roofing mortar, or caulk securing the flashing. This step requires precision to avoid damaging the roof or surrounding materials. Once the fastening materials are removed, gently pry the flashing away from the roof.
4. Install New Flashing
With the old flashing removed, it’s time to install the new flashing. Make sure it fits snugly against the structure it’s protecting, whether it’s a chimney, vent, or dormer. Secure the flashing with nails, ensuring they are capped with roofing cement to maintain a watertight seal.
5. Reinstall Shingles
Finally, replace the shingles over the new flashing. Ensure they lie flat and are properly aligned to prevent water from seeping underneath. Secure the shingles with nails, and add a bead of roofing cement along the edges for extra protection against leaks.
While some homeowners might consider tackling roof flashing repair on their own, it’s important to weigh the complexity and risks involved.
Complexity and Risks
Repairing roof flashing is not as straightforward as it might seem. It requires a good understanding of roofing materials and techniques. Mistakes can lead to leaks, further damage, and costly repairs. Additionally, working on a roof can be dangerous without the proper safety equipment.
Benefits of Hiring Professionals
Hiring professionals like Roof Experts offers several advantages:
For Massachusetts homeowners, Roof Experts provides expert roof flashing repair services, ensuring your home stays dry and protected against the elements.
Understanding the cost of roof flashing repair is essential for budgeting and planning. Here’s a breakdown of what you might expect when considering these repairs.
On average, homeowners spend between $150 and $8,000 on roof repairs, with flashing repair typically falling in the lower range of this spectrum. Minor flashing repairs, like fixing small leaks or replacing a few shingles, might cost between $150 and $1,500. However, if the damage is more extensive, involving major flashing replacement, costs can escalate to $1,500 to $8,000.
Several factors influence the cost of repairing roof flashing:
Labor costs are a significant part of the repair budget. Roofers usually charge between $3 to $7 per square foot. The complexity of the work and the time required can affect the total labor cost. For example, a simple repair might take a few hours, while more complex jobs could take several days.
The choice of materials also impacts the overall cost. Common materials used for flashing include:
Each of these materials comes with different price points, so discussing options with a roofing professional can help you decide what best fits your budget and needs.
By understanding these cost elements, you can better plan for your roof flashing repair project, ensuring you get quality work done within your budget. For Massachusetts homeowners, Roof Experts offers competitive pricing and expert services to keep your home protected.
Fixing roof flashing involves a few key steps to ensure your home stays dry and protected. Here’s how it’s done:
For a more detailed guide, consider consulting a roofing professional, as improper repairs can lead to further issues.
While it’s possible to fix roof flashing yourself, there are important factors to consider:
For homeowners in Massachusetts, Roof Experts provides expert services that ensure your flashing is repaired safely and effectively.
Yes, you can replace flashing without needing to replace the entire roof. This is often done in specific instances, such as:
If you’re unsure about the condition of your flashing, a professional inspection can help determine the best course of action.
Regular maintenance of your roof flashing is crucial for the longevity and safety of your home. By ensuring this component is in good condition, you can prevent leaks and water damage that might otherwise lead to costly repairs. Roof flashing repair is not just about fixing leaks; it’s about safeguarding your home from the elements.
Professional Repairs Offer Peace of Mind
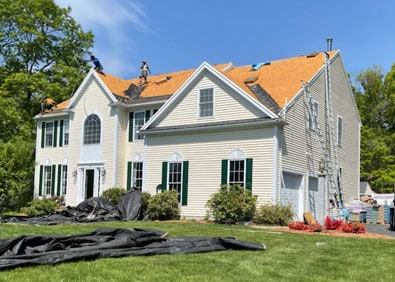
While DIY repairs might seem tempting, hiring a professional ensures the job is done right. Professionals have the expertise to spot issues that may be missed by an untrained eye. They also have the right tools and materials to perform a repair that will last. For homeowners in Massachusetts, Roof Experts offers reliable and high-quality roofing services. With over 20 years of experience, our team is dedicated to providing excellent workmanship and customer service in the Franklin and Bellingham areas.
Why Choose Roof Experts?
We understand the unique challenges of maintaining a roof in Massachusetts’ diverse climate. Our detailed inspections and custom solutions ensure that your roof remains in top condition, protecting your investment and enhancing the curb appeal of your home. Whether you need a simple repair or a complete roof replacement, our experts are here to help.
Contact Us Today
Don’t wait until a minor issue becomes a major problem. Regular inspections and timely repairs can save you time and money in the long run. For more information on our services or to schedule a consultation, visit our roof repairs page. Let us help you keep your roof in perfect condition, ensuring your home remains safe and beautiful for years to come.
[/et_pb_text][/et_pb_column][/et_pb_row][/et_pb_section]
Roof Installations

Roof Replacements

Roof Repairs