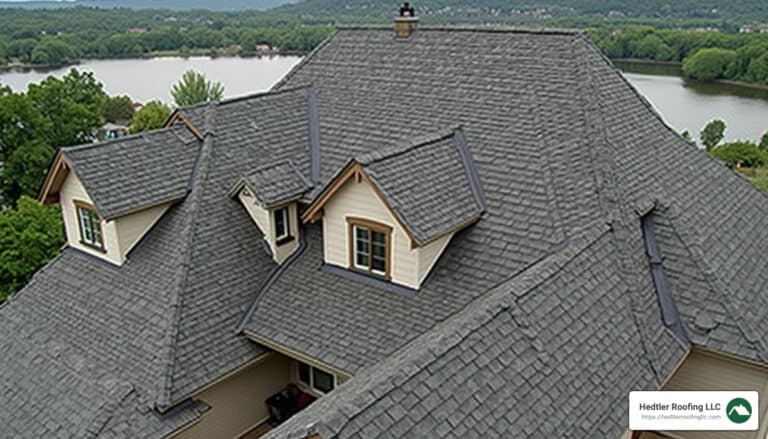
Residential roof installation is a critical project for any homeowner. It not only improves the appearance of your home but also ensures protection against the elements. For those in Massachusetts, dealing with severe weather like heavy snow or strong winds, having a reliable roof is essential. Here are the basics you need to consider:
I’m Jason Hedtler, owner of Roof Experts. With over 20 years of hands-on experience, I specialize in residential roof installation custom to meet the unique needs of Massachusetts homeowners. My commitment is to provide top-quality roofing solutions that stand the test of time.

Residential roof installation word list:
– roofer service
– roof maintenance services
Before diving into a residential roof installation, it’s crucial to assess your existing roof. This involves a thorough inspection, understanding the extent of any damage, estimating the remaining lifespan, and obtaining necessary permits. Let’s break it down.
Regular inspections are key to maintaining your roof’s integrity. Here’s how to conduct a thorough inspection:
Certain areas of your roof are more prone to damage:

Knowing the lifespan of your roofing materials helps you plan for a replacement. Here are some common materials and their life expectancies:
Most contractors recommend replacing materials at around 80-85% of the roof’s life. For example, consider replacing a 25-year roof around the 20-year mark to avoid running the risk of replacing it too late.
Before starting your project, check local regulations. You’ll likely need a building permit. This ensures your roof meets all local codes, which vary by region and climatic zone. Permits are essential for:
By conducting a thorough inspection, identifying vulnerable areas, understanding the lifespan of materials, and obtaining the necessary permits, you set the stage for a successful residential roof installation.
Next, we’ll cover how to prepare for your roofing project, including safety precautions, tools, and materials needed.
Before starting your residential roof installation, preparation is key. This includes taking safety precautions, gathering the right tools and materials, and considering weather conditions. Let’s dive in.
Safety should be your top priority. Here are some essential precautions:
Pro Tip: Never work alone. Having a partner increases safety and efficiency.
Having the right tools makes the job easier and safer. Here’s a list of essential tools:
Gathering all necessary materials beforehand ensures a smooth workflow. Here’s what you’ll need:
Timing your project with favorable weather conditions can make a significant difference.
By prioritizing safety, gathering the right tools and materials, and considering the weather, you can set the stage for a successful residential roof installation.
Next, we’ll cover the step-by-step process of tearing off the old roof, repairing the decking, and installing new materials.
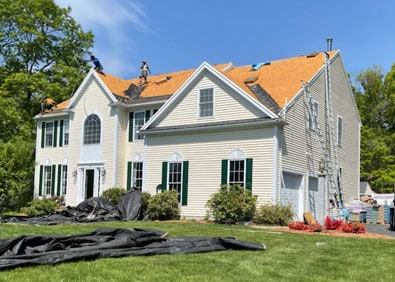
The first step in any residential roof installation is to remove the old roof. This process is known as “tear-off.”

Pro Tip: Remove all old nails or pound them flat to prevent tearing the new shingles.
Once the old roofing is removed, inspect the roof decking (also known as sheathing).
Underlayment is crucial for protecting your roof deck from water damage.

Flashing prevents water from seeping into joints and valleys.
Now it’s time to install the shingles.
The final step is to install the ridge cap shingles.
By following these steps, you can ensure a successful residential roof installation that will stand the test of time. Next, we’ll explore the different types of roofing materials you can choose for your project.
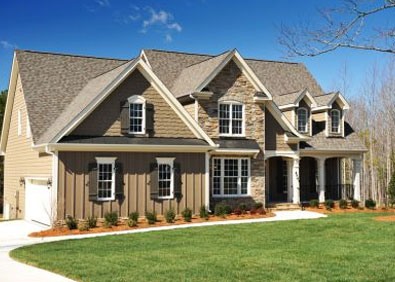
When it comes to residential roof installation, selecting the right material is crucial. Each type of roofing material offers unique benefits and challenges. Let’s explore the most popular options: asphalt shingles, metal roofing, cedar shake, synthetic roofing, and slate roofing.
Asphalt shingles are the most common roofing material in the U.S.
Pros:
– Cost: Highly economical, with prices ranging from $425 to $825 per roofing square.
– Lifespan: Typically lasts 20-30 years.
– Installation: Easy to install, making it ideal for DIY projects.
– Durability: Performs well in extreme temperatures and weather conditions.
Cons:
– Lifespan: Shorter compared to other materials.
– Weather Sensitivity: Can be damaged by severe weather like heavy snow or hail.
Metal roofing is gaining popularity due to its longevity and energy efficiency.
Pros:
– Durability: Can last 40-70+ years.
– Energy Efficiency: Reflects solar heat, reducing cooling costs.
– Modern Appearance: Offers a sleek, contemporary look.
Cons:
– Cost: Higher upfront costs, ranging from $1,038 to $1,828 per roofing square.
– Noise: Can be noisier during rain or hail unless properly insulated.
Cedar shake offers a natural, rustic look.
Pros:
– Aesthetic: Provides a traditional, charming appearance.
– Lifespan: Lasts around 20-30 years with proper maintenance.
– Insulation: Natural insulation properties help with energy efficiency.
Cons:
– Maintenance: Requires regular upkeep to prevent rot and insect damage.
– Cost: More expensive than asphalt shingles.
Synthetic roofing materials are designed to mimic natural products like slate and wood.
Pros:
– Cost: Generally less expensive than natural materials.
– Durability: Long-lasting and resistant to weather conditions.
– Installation: Easier to install than natural materials.
Cons:
– Aesthetic: May not have the same authentic look as natural materials.
– Environmental Impact: Some synthetic materials are not biodegradable.
Slate roofing is known for its durability and aesthetic appeal.
Pros:
– Lifespan: Can last 75-200 years, making it a lifetime investment.
– Durability: Highly resistant to fire and extreme weather.
– Aesthetic: Adds a distinctive, high-end look to your home.
Cons:
– Cost: One of the most expensive roofing materials, ranging from $756 to $1,870 per roofing square.
– Weight: Very heavy, requiring additional structural support.
– Installation: Requires specialized skills, increasing labor costs.
Choosing the right roofing material is essential for the longevity and performance of your roof. Up next, we’ll answer some frequently asked questions about residential roof installation to help you make an informed decision.
The cost to install a new roof can vary widely based on several factors. The national average cost to replace a roof is around $8,000, with most homeowners spending between $5,500 and $11,000. However, high-end materials like metal or slate can push costs up to $46,000 for an extensive replacement.
Factors Affecting Cost:
– Labor: This is a significant portion of the cost, accounting for about 60%. DIY can save on labor but requires skill and time.
– Materials: The remaining 40% of the cost is for materials. Asphalt shingles are the least expensive, while copper and slate are among the most expensive.
– Extent of Damage: If the underlying structure is damaged, expect higher costs for repairs and additional materials.
The timeline for installing a new roof depends on the size and complexity of the project. For an average-sized home (around 3,000 square feet or less), the roof replacement can typically be completed in two days. However, several factors can extend this timeline.
Factors Affecting Timeline:
– Size and Complexity: Larger and more complex roofs with multiple angles, chimneys, and skylights can take longer.
– Weather Conditions: Rain, extreme heat, or cold can delay the project. Roofing should ideally be done in dry, mild weather.
– Material Availability: Delays in the supply of materials can also extend the timeline.
Roofing a house yourself is possible, but it’s not a task to be taken lightly. It involves heavy lifting, working at heights, and a significant time commitment. If you’re considering a DIY approach, here are some points to ponder.
DIY Considerations:
– Safety: Falls are the leading cause of injury among roofers. Always use safety gear like helmets and harnesses.
– Skill Level: Roofing requires knowledge of tools and materials. If you’re not comfortable using power tools or working on a roof, it’s best to hire a professional.
– Time and Effort: A professional crew can complete the job in a fraction of the time it would take an inexperienced DIYer. Be prepared for a significant time investment if you go the DIY route.
While DIY can save on labor costs, the risks and complexities involved make professional installation a safer and more efficient option for most homeowners.
Next, let’s dig into the details of the step-by-step residential roof installation process to give you a clearer picture of what’s involved.
In conclusion, residential roof installation is a complex process that requires careful planning, the right materials, and expert workmanship. From assessing your roof’s condition to choosing the best materials and ensuring proper installation, every step is crucial for a successful project.
At Roof Experts, we pride ourselves on delivering top-notch roofing services in Massachusetts. With over 20 years of experience, our team is committed to providing high-quality workmanship and exceptional customer service. We understand that a new roof is a significant investment, and we’re here to help you through every step of the process.
If you’re considering a roof replacement or installation, don’t hesitate to reach out to us. We offer detailed roof inspections, expert advice on the best materials for your home, and professional installation services.
Contact Information:
Your roof is our reputation, and we are dedicated to ensuring your home remains protected and aesthetically pleasing for years to come. Contact us today for a free estimate and let us take the load off your plate.
For more information, visit our roofing services page.
Roof Installations
Roof Replacements

Roof Repairs